
Okay, for those of you who have the Spring Mini already, you know how irresistible some of the new products are. My first pick is the round tab punch. It makes fabulous
faux-folder cards.
The top card is a card we made at Margo's
Stampadelicious Achiever's Club in February. It uses the Round Tab Punch, Office Accoutrement set, and the Notations designer paper. The one beneath the Office
Accoutrement card uses Polka Dots & Paisley (I got the flower idea from SCS—cards by: bdrew, indyemmert, cynthia_wilson, and nancyruth). The paisley petals are actually a pain to set in a circle. I trimmed the paisley's points off to prevent the center of the flower from becoming too thick (and to avoid cutting around the curled tail). Then I cut out a circle of white cardstock, and adhered each petal to the circle, trying to space the petals evenly, and then adhered the whole flower to the card.

The Hello doodle card also came from Margo's Achiever's Club. It showcases the Doodle Alphabet and Doodle This set. I loved how we colored the dots around the tendrils with a white gel pen to make the images really pop. I should have left a slightly larger white margin around the flower when cutting it out. The other is just another variation I made using lighter colors and the Delight in Life SAB set.
This beautiful card was a M&T from the Margo's Stampadelicious group meeting in February.

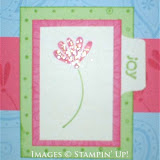
She adapted it from a long note on the SU! Demo site. The awesome thing is that it uses ALL of the products offered in the Spring Fever Bundle promotion. It was my first time using the white craft ink cartridge for a stampin' around wheel...and I'm a fan! Such a fun set of products. Just a note: the Spring Mini does not do the Petals & Paisley designer paper justice. They are soooo beautiful in real life. You just have to see it for yourself. And what a fun combo of colors!
These last to sets of cards used Polka Dots & Paisleys.

The first set is what I like to call "Tabbed Faux-Folders" (again the idea came from Margo's card above). They're like little file folders that you can stick pictures in, gift certificates, a pressed flower, or just a plain old note. They make a great card to send to co-workers, especially given that they are not extremely feminine. I would highly recommend the Office Accoutrement set and Round Tab Punch to any business women.
And the last set of cards uses faux stitching. The flowers on the left were stamped, and the flowers on the right were water colored. I prefer the stamped flowers when using this set. This is a great card to show off a lot of accessories, like the Word Window Punch, Eyelets, Crafter's Toolkit, White Gel Pen, etc.). I love these cards not only because of the Springy colors, but because they show off every stamp in the Polka Dots & Paisley set.

And now I'm sure you just found one more thing to add to your wishlist. Happy Stamping!


 too much time creating. But my tinies went to stay with my parents for the weekend, and my hubby went camping, so I had plenty of time to just play.
 bashful blue. I know it's not the traditional Easter-pastel look, but it works, and it looks much better in person. The camera washed out the image a little, but it's a great card to showcase the aquapainters, grosgrain ribbon, brads, and the round tab punch.


