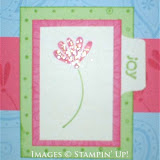
I decided to finish off some gift card holders/gift bag tags for my stash using my UFOs (Thanks for the motivation, GinaP). I try to keep about 15 on hand at all times for those emergencies that always seem to crop up.
Alana's Gift Card Instructions
Finished size: 2-3/4” x 4-1/4”
Each card is 2-3/4” x 8” long, which means you can get 4 from an 8-1/2” x 11” sheet of CS. If you aren't worried about saving paper, 3" x 8" looks great.
- First score sheet at 3-3/4” (x 11”).
- Cut at 8” (x 11”).
- Cut into strips 2-3/4” wide x 8" long.
- Layer and embellish card. *Hint: I always use dimensionals to adhere the layered image to the card (it allows for more flexibility in opening and closing the card flap--otherwise layers tend to rebel and fall off).
- Use slit punch to create flap to hold card closed.
- Attach gift card inside with mini glue dot(s) if desired. If you want to hang it just as a tiny note from a gift, punch a 1/8” hole at the top left corner and set an eyelet.
- For a SMALLER CARD to attach to gift (without a gift card inside), you can score at 3-1/2” and cut at 7-1/2” OR EVEN SMALLER score at 3-1/4” and cut at 7”. (If they aren’t holding a gift card, they don’t need to be so long…in my estimation☺)


7 comments:
Oh, what a great idea!! Very pretty.
Very cute ... I need to clean out my scraps...
Great. Motivates me to finish that things I have started. Well at least I am thinking about it. Baby steps.
WOW! These gift cards are beautiful!
I'm coming to your blog and adding you to my list on my blog. FUN!
Alana these are beautiful. thanks for the instructions!
Cute Cards! tfs
Great giftcards and ideas!
Post a Comment